Blurry or broken date codes from an inkjet coder almost always trace back to six root causes: a partially blocked nozzle, ink viscosity drift, the wrong print distance, line speed mismatch, poor print synchronization, and a substrate the ink cannot bond to. Check them in that order. Nozzle condition and ink viscosity cause most blur problems on continuous inkjet (CIJ) coders, and most of the six fixes take minutes and no new parts.
Key takeaways:
Check the nozzle first. A partially blocked CIJ nozzle is the most common cause of fuzzy or half printed characters, and a standard flush cycle usually clears it.
Viscosity drift changes dot gain. Ink that is too thin spreads on the surface; ink that is too thick starves the jet. Both read as blur.
Print distance is short by design. Most CIJ print heads are built for roughly 10 mm or less between nozzle and product.
Speed mismatch stretches characters. If product speed and print timing disagree, codes elongate and smear.
Static and surface contamination ruin dot placement. Plastic film with static charge, or a wet or oily surface, deflects drops before they land.
Recurring blur across shifts usually means process drift, not a dying machine. Fix the process before you budget for a replacement.
Always test on your own packaging. Adhesion and sharpness depend on the exact surface, so run a trial print before you commit to an ink or a machine.
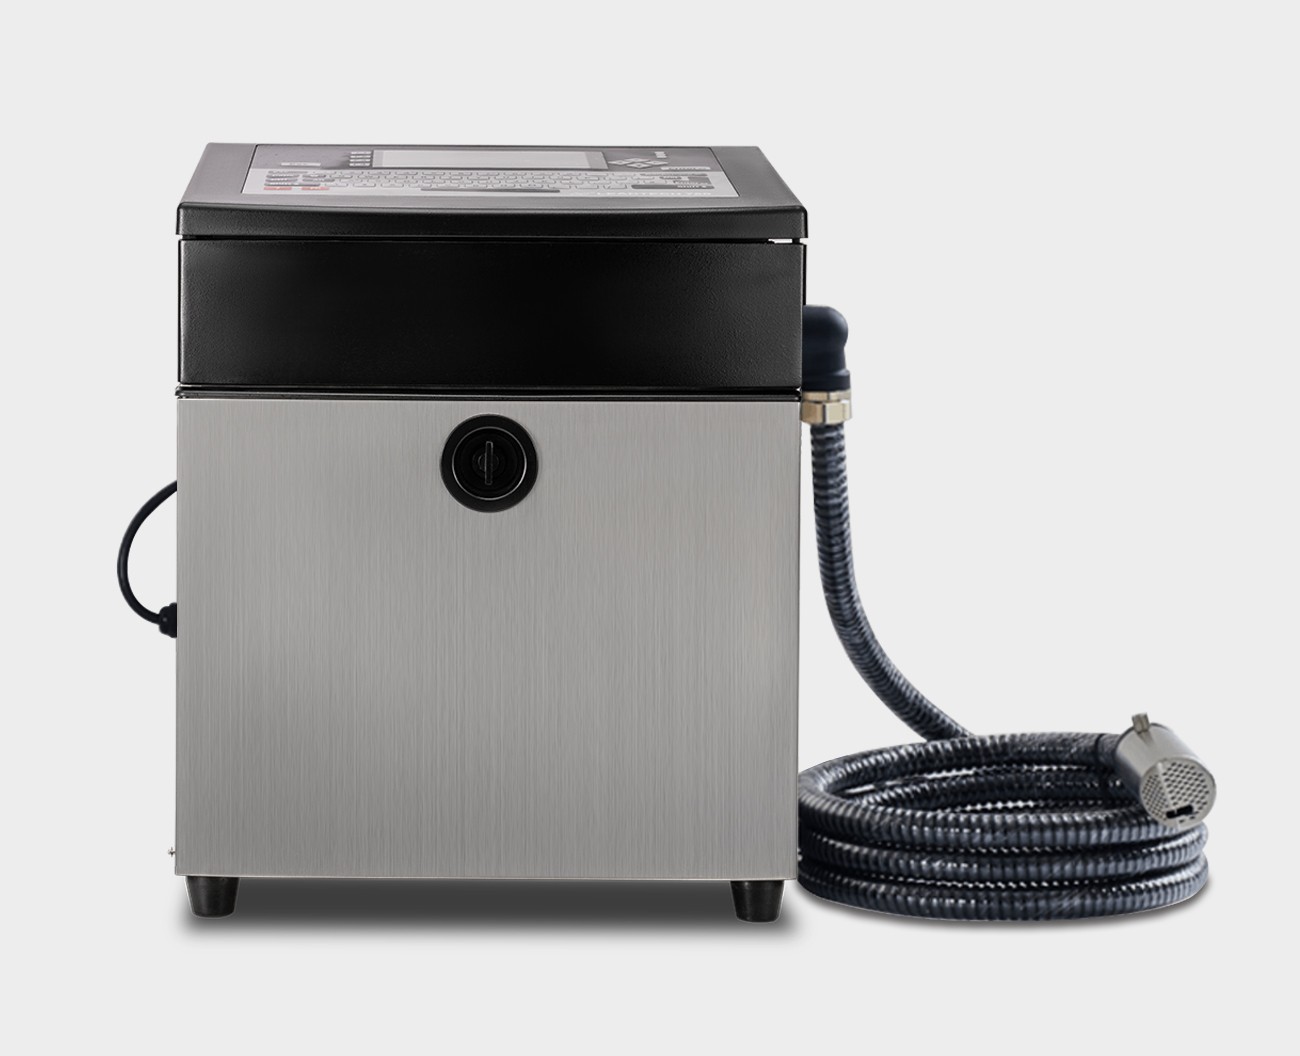
A continuous inkjet (CIJ) coder: the cabinet supplies ink and control, the print head mounts at the line.
Match the symptom to the most likely cause before you open a tool box:
| Symptom pattern | Most likely cause | First action |
|---|---|---|
| Ragged strokes, one side of characters missing | Blocked nozzle | Run the flush cycle, then the nozzle test |
| Codes bleed and strokes merge into blobs | Viscosity too low | Check the viscosity reading, let auto control settle |
| Codes faint and broken, drops missing | Viscosity too high | Add solvent, wait for the machine to stabilize |
| Characters stretched, squashed, or uneven | Speed or sync fault (Causes 4 and 5) | Compare line speed setting with real belt speed |
| Stray dots sprayed around the code | Static or dirty surface | Ground the line, clean the surface, add an ionizer |
| Blur appears only on one product type | Ink and substrate mismatch | Ask for an adhesion test on that exact material |
A CIJ nozzle is a precision hole, typically between 40 and 75 microns, smaller than a human hair. Even a thin film of dried ink on one edge is enough to deflect every drop that passes through.
What you see: characters with a missing stroke, ragged left or right edges, or the top and bottom rows printing weaker than the middle. Quality often drops over a run and recovers after a flush, which is the strongest clue that the nozzle is the problem.
Why it happens: ink dries inside the nozzle during long changeovers or after an improper shutdown. Airborne dust near the print head can also stick to the wet nozzle face. Ink that is close to its shelf life tends to gum up faster than fresh ink.
How to check: run the built in nozzle test, which prints rows of characters and shows which jets are weak. On most machines you can also watch the jet stream itself through the service menu: a clean nozzle produces a steady, thin, unbroken line.
The fix:
Run the automatic flush cycle once or twice, then repeat the nozzle test.
If the pattern is still broken, do a manual purge with the solvent and procedure from the machine manual.
Replace the ink filters on the schedule the maker specifies, not when they fail.
Always use the proper shutdown routine so the head rinses and seals itself with solvent.
Most nozzle blockages clear at step 1. If they return weekly, look for the root cause in shutdown habits, dust near the head, or aging ink.
Viscosity is the resistance of the ink to flow. A CIJ machine meters ink in extremely small drops, so a small viscosity change visibly changes the code. Modern machines measure viscosity and correct it by adding solvent, but the correction takes time and has limits.
| Viscosity state | What the code looks like | Typical reason |
|---|---|---|
| Too thin, over diluted | Dots spread, strokes merge, code edges bleed | Too much solvent added at once |
| Too thick | Broken strokes, faint code, drops fail to deflect | Solvent evaporated in hot or dry workshop air |
Why it drifts: solvent evaporates faster in a hot, dry workshop, during long runs, or from bottles left open. Temperature swings between shifts also move viscosity, because the same ink flows differently at different temperatures.
How to check: read the viscosity value on the control panel and compare it with the target window in the ink datasheet. Note when the machine last added solvent; if it tops up constantly, the environment or the ink is the issue, not the printer.
The fix: after any top up, give the machine ten to fifteen minutes to stabilize before you judge print quality. Keep ink bottles sealed, store them within the temperature range on the datasheet, and keep the ink reservoir at a stable temperature. If drift repeats daily, ask your supplier whether a different ink blend suits your workshop conditions better.
Every print technology has a design distance between the nozzle and the product. Outside that window, dot placement suffers.
| Technology | Typical print distance |
|---|---|
| Continuous inkjet (CIJ) | Around 10 mm or less |
| Thermal inkjet (TIJ) | Near contact, a few millimeters |
| Large character valve jet | More tolerant, confirm with the maker's specification |
What you see: with the head too far away, drops slow down and wander, so the whole code looks soft and the dot edges feather. With the head too close, the nozzle can catch spray back or the product can touch the head plate, which smears the code and risks damage.
Why it happens: the distance was set for one pack format and never checked after a changeover. Or the product itself varies: bottles from different molds, cartons that sit higher on the conveyor, or film that flaps as it moves.
How to check: stop the line and measure the gap between the nozzle face and the product surface at the point of printing. Check more than one product if you run several formats.
The fix: set the gap to the specification in the machine manual, then add a guide rail or fixture so every product passes the head at the same height. Recheck the gap after every format change; this is a two minute job that prevents hours of quality complaints.
The coder prints at a fixed dots per second rate and assumes a product speed. If the real line runs faster than the setting, the code stretches and the strokes thin out. If the line runs slower, the code compresses.
Why it happens: the belt speed was changed for a new product, a gearbox ratio changed, or the speed parameter in the coder was never updated after commissioning. Manual speed settings drift from reality whenever operators change the drive for any reason.
How to check: compare the line speed setting in the coder with the actual belt speed. Measure it directly: mark two points a known distance apart on the conveyor frame, time a product between them, and calculate the speed. Then compare a static test print, with the line stopped, against a print made at running speed. If the two prints differ in character width, you have found the problem.
The fix: update the speed setting to match the measured belt speed. For any line where speed varies, connect an encoder. An encoder is a wheel that rides the product or the belt and tells the coder the true speed moment by moment, so the code scales itself automatically. Encoder feedback is the standard cure for stretchy codes on variable speed lines.
The trigger sensor tells the coder the exact moment a product arrives. If the signal is late, early, or inconsistent, the code lands in the wrong place, half on the product and half off, or prints over the previous code.
Common triggers:
The sensor lens is dusty, so detection fires late and the code sits too low.
The sensor sees a reflective surface at an angle and double triggers.
The print delay value is wrong after a pack format change.
Product spacing is too tight, so the coder is still printing when the next product arrives.
The fix, in order: clean the sensor lens, align the sensor so it detects the same point on every product, set the print delay so the code starts a few millimeters after the leading edge, and keep the minimum product gap the maker specifies. Products that touch each other cannot be coded reliably by any inkjet machine.
The ink chemistry must match the surface. When it does not, the machine can be perfectly healthy and the codes still look bad.
Static charge. Plastic film builds static on fast lines, and a charged surface deflects the charged drops of a CIJ jet. The result is stray dots around the code. Ground the conveyor frame, and add an ionizing bar before the print station if film static persists.
Wet, oily, or dusty surfaces. Ink floats on contamination and smears at the next machine. Check upstream processes, dry cold filled bottles before coding, and keep sealing jaws clean.
Wrong ink family. Fast drying solvent based inks, often MEK based, suit plastics, glass, and metal. Water based inks suit porous paper and board. Dye based inks disappear on dark surfaces, so use a pigment ink, such as white or yellow, for dark bottles and film.
Condensation. Cold filled drinks collect dew on the outside. Code below the condensation band if the design allows, or ask for an ink rated for damp surfaces.
One habit prevents all of these: before you order ink in volume, send your actual packaging material to the supplier and ask for an adhesion and sharpness test on it.
Work the six causes in order and most blur problems end at the flush cycle or the viscosity panel. Use this closing table to recap the decision:
| Symptom | First action | If it keeps coming back |
|---|---|---|
| Ragged or missing strokes | Flush, nozzle test, purge | Book a head service; check ink age |
| Bleeding or faint strokes | Viscosity check and settle time | Ask about an ink blend for your workshop |
| Soft code, all characters | Measure and reset print distance | Add a product guide or fixture |
| Stretched characters | Verify belt speed, update setting | Install encoder feedback |
| Code in the wrong place | Clean and align the trigger sensor | Review product spacing and print delay |
| Blur on one product only | Adhesion test on that material | Change ink family for that line |
Replace the machine rather than repair it when you see these signals together: maintenance downtime rising month over month, spare parts getting hard to source, a new line speed beyond the current coder's comfortable range, or new requirements such as 2D codes and more variable data. Current generation small character inkjet printers automate the nozzle flush at start and stop, hold viscosity tightly, and clean themselves on a schedule, which removes most of the daily tuning described above. If you also run secondary packaging, the wider inkjet printing machine range covers large character and high resolution work on the same line.
Temperature rise and solvent evaporation push ink viscosity up during the run, and the auto correction lags behind. Watch the viscosity value on the panel through the day, keep the ink at a stable temperature, and give the machine time to settle after each solvent top up.
Follow the maker's schedule. A typical routine is the automatic flush at every start and stop, plus a deeper service monthly or at the ink volume interval the manual states. Lines that run short batches with long idle gaps need more frequent flushing, because dried ink is what blocks nozzles.
Yes. High humidity slows solvent evaporation, so the printed film stays wet longer and smears at the next station. Improve airflow over the print point, increase the distance between coder and the next machine, or ask for a faster drying ink blend.
Usually not. Head failure is the least common of the six causes here. Rule out nozzle blockage, viscosity, distance, speed, and surface condition first. A head is suspect only when a clean flush and correct settings still leave broken characters.
Print the nozzle test pattern. A clean, uniform pattern means the machine is healthy and the issue sits with the ink or the surface. Then run your material through a demo unit with a different ink. The combination that prints sharp is your answer.
If the same blur keeps returning week after week, the fastest fix is a short conversation with an applications engineer. Send your packaging material, your line speed, and a photo of the faulty code, and ask for recommendations and a trial print on your own surface. NANO MARK answers line review requests directly, and a trial print settles the nozzle, ink, and substrate questions in one pass.
Contact: Jason
Phone: +8613337336942
E-mail: [email protected]
Add: Hangzhou City, Zhejiang Province, China